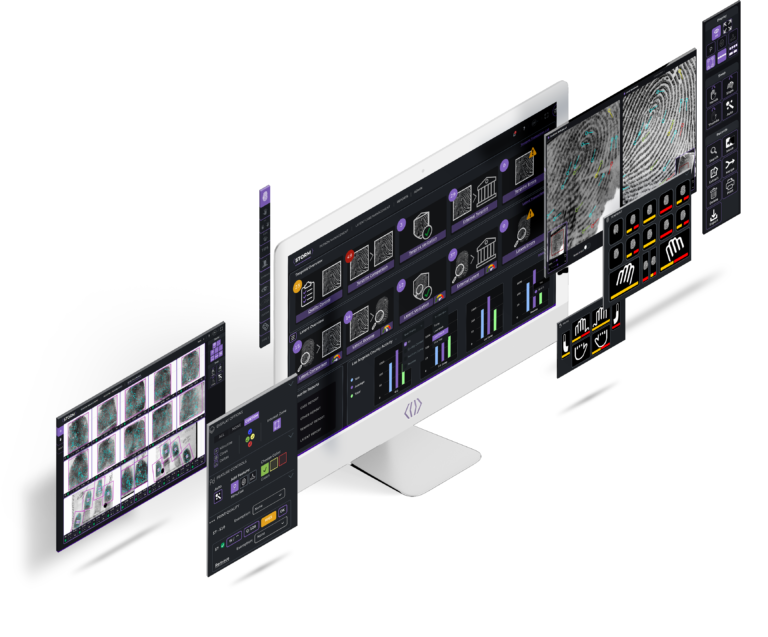
HOW CAN WE HELP?
Search for common FAQ’s or training documentation.
Support Chat
Can't find what you're looking for? Contact us directly for more information.
Frequently Asked Questions
GENERAL
If STORM is not performing as expected, it is recommended that you first click on the STORM icon in the top-left corner to return to the Landing Page. Then navigate back to the screen that appeared stuck. Usually this should clear up the issue and return STORM to normal conditions.
If the problem persists, try closing all Chrome windows. Re-open Chrome and clear the cache from the Privacy tab in Chrome settings. Then log back into STORM and navigate back to the screen where the problem was occurring.
If the problem still persists, please contact IDEMIA Customer Support.
To view the full guide to mouse and keyboard controls, click here.
It is recommended that users access the STORM system with a modern PC using the Chrome application. Other hardware that can run a Chrome browser may be supported, but the User Interface may not display properly for all screen shapes and sizes.
Users should ensure that their PC receives regular Windows and Chrome updates. The STORM system will be automatically updated in the cloud. Your system administrators will be notified prior to each update, and the notice will include instructions if they need to take actions to activate any new features.
Access to your STORM system is controlled through an Identity Provider (IDP) that is controlled by your STORM administrator. Contact your administrator for assistance with new accounts.
Access to your STORM system is controlled through an Identity Provider (IDP) that is controlled by your STORM administrator. Contact your administrator for assistance with your username or password.
Functionality
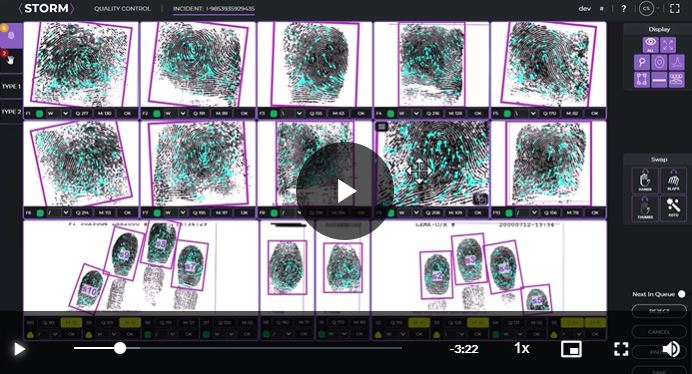
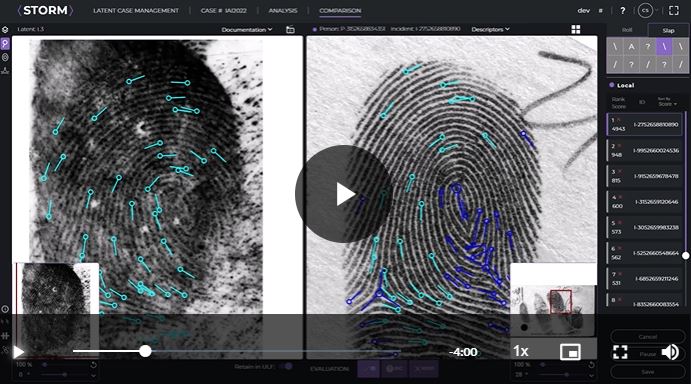
When placing minutia, core, or delta features on known prints in the QC/PM Details screen or latent prints in the Latent Analysis screen, the menu allows the user to select the feature color. Green indicates that the user has high confidence that the feature exists at this location. Yellow indicates medium confidence, and red, low confidence. The GYRO System for marking minutiae is a common way to document the examination process. If the user edits the location or direction of a feature, it will take on the currently selected color. These colors are only to assist the user in their examination and do not affect the search algorithms.
In the QC/PM Details screen or the Latent Analysis screen, automatically encoded features are cyan in color. Cyan is used to indicate that the feature location and direction was determined by the STORM system and not by the user.
In the Tenprint and Latent Comparison screens, features in the candidate are generally colored blue. The STORM system will automatically detect the minutiae in the search and candidate prints that best match. These Mated Minutiae is an approximation based on the distances between features and some features marked as ‘mated’ may not be. All features in the search print appear in the same color as they were marked prior to search. The color of mated features in the candidate print are automatically changed from blue to the color of their mate in the search print.
[1] Langenburg, G. & Champod, Christophe. (2011). The GYRO system – a recommended approach to more transparent documentation. Journal of Forensic Identification. 61. 373-384.
When reviewing tenprint records during the Quality Control step or in the Person Management screen, minutiae, cores, and deltas are automatically encoded. In general, users should not edit these cyan features in the tenprint records. If there are significant quality issues in the image that result in multiple, significant errors in feature placement and orientation, then the Details page allows the user to manually edit the features.
The STORM search algorithms treat automatically and manually encoded images differently. In general, automatically encoded features are given a wider tolerance during search. If one or more features are added, edited, or deleted from the image, the STORM system assumes that the user has reviewed all features and approved their location and direction.
If any feature is added, edited, or deleted from a known print image, it is IDEMIA’s best practice recommendation to manually review all features in the image to ensure that they are placed correctly. Also, it is recommended that the user not edit any feature in most known print images.
The STORM system does not have separate icons for ridge endings and bifurcations. Instead, the location of the feature indicates the difference between feature type. To mark a bifurcation, imagine a line that travels along the center of the ridges. The circle portion of the minutiae marker should be placed on the point at which this line splits from one ridge to two ridges. The end of the marker tail should be placed at the center of the furrow between the bifurcated ridges. To mark a ridge ending, imagine a line that travels along the center of the furrows. The circle portion of the minutiae marker should be placed on the point at which the furrows meet and surround the ending ridge. The end of the marker tail should be placed at the center of the ridge that ends.
Minutiae markers should not be placed on certain minutiae.
- Minutiae that are too close to the core or delta where the ridges have a high recurve should not be marked. If the minutiae tail passes through other ridges or furrows, then the recurve is too high to place a marker.
- Some short ridges, spurs, enclosures, and over-unders (handshakes) should not be marked. If the markers are far enough away from each such that the tails do not touch the circle of the other marker or the tails extend into the other marker, then mark both features. If the markers are close enough that the tails extend all the way through the circle of the other marker, then do not mark either minutia.
- Cores with a stem may look like a ridge ending, but they should be marked with a core marker, not a minutia marker.
- Do not mark dots with minutiae markers.
- Do not mark incipient ridges with minutiae markers.
In general, do not adjust cores or deltas in known print images. If the marker placement is significantly misplaced, then adjust the core or delta marker(s) and ensure that all minutiae are reviewed and adjusted as necessary. When cores and deltas are visible in the latent print image, they should be marked. Do not guess or approximate the location of cores or deltas in latent print images.
When reviewing known print records in Quality Control (QC) or Person Management (PM), the user should ensure that each pattern classification is set correctly. The ‘\’, ‘/’, ‘W’, and ‘A’ abbreviations are used to indicate right loop, left loop, whorl, and arch patterns. Most fingerprint images have clear patterns, and the user should ensure that the correct pattern is selected for each finger. Some fingerprint images have ambiguous patterns or partial latent print impression from that finger may appear to have a different pattern (e.g., the side of a double-loop whorl may appear to be a loop). The user can select up to three patterns for each finger. The ‘?’ abbreviation indicates that the quality of the impression is so low that it is impossible to eliminate any of the patterns.
When searching latent prints, the best practice recommendation is to not select a classification pattern for the initial search. If the initial search does not result in an Identification, then a second search should use the classification pattern filter. Setting the pattern classification in latent print searching provides a modest improvement in search accuracy. However, incorrectly filtering out the known print pattern will decrease search accuracy. Therefore, include any pattern if there is a possibility that the latent print is or may be interpreted as that pattern.
Best practice recommendations for latent print searching include the following steps.
- For an initial search, consider the following parameters.
- Auto-encode the latent print and do not add, edit, or delete any features.
- Ensure that the search filters are set to all fingers (or all palm areas), all pattern classifications (for finger searches), and unknown orientation.
- Request a small number of candidates (1-5, depending on crime type and agency protocols).
- If the initial search does not result in an Identification, launch a second search with the following parameters.
- Auto-encode the latent print and manually add, edit, or delete features as needed following the minutiae placement best practices.
- If the user is very certain about the finger number, palm area, pattern classification, and/or distal orientation, then set those search filters. Note: If the user is incorrect about their assessment of any of these parameters, search accuracy is significantly reduced.
- Request a moderate number of candidates (5-10, depending on crime type and agency protocols).
Training Videos
Access all training videos and tutorials through our Learning Lab portal.
GETTING STARTED
Training on how to navigate the STORM application and the functions of each icons on the homepage.
TENPRINT OVERVIEW TRAINING
Videos on tenprint workflow, quality control, comparison, verification, external tenprint and errors.
LATENT OVERVIEW TRAINING
Videos on latent case managent, analysis, comparison, verification, external latent and errors.
Contact Us
Use our chat-bot at the bottom of the screen to chat with support now or contact us via email by filling the form below.
© IDEMIA Identity & Security North America. All rights reserved.